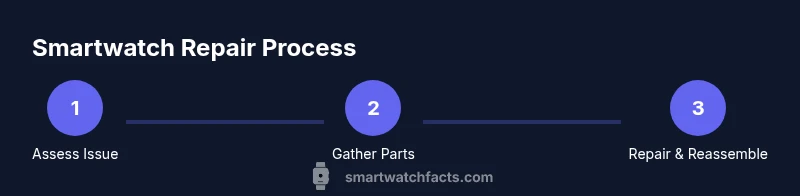
How to Repair a Smartwatch: DIY Guide for Beginners
Learn practical, safe steps to diagnose and repair common smartwatch issues at home. This guide covers batteries, screens, water resistance, and sensors, with tool lists, step-by-step instructions, and safety tips.

This guide shows how to diagnose and safely repair common smartwatch issues at home, including battery, display, and sensor problems. It covers safety, tool selection, and when to seek professional service, helping you extend device life while protecting data and warranty where possible.
Why Repairing Your Smartwatch Matters
Smartwatches are compact, highly integrated devices with tiny batteries, microprocessors, and precise sensors. When a fault arises, it’s tempting to replace the device, but many issues are repairable with the right approach. According to Smartwatch Facts, repairing rather than replacing can significantly extend device life, cut electronic waste, and save money—especially for models with common issues like battery aging, screen micro-cracks, or sensor drift. This article helps you decide when DIY repair is practical and how to weigh the risks. You’ll learn how to evaluate the device’s value, warranty status, and potential costs of professional service versus a home fix. The aim is to empower you to act confidently, not to promise a universal cure; some issues simply aren’t worth the DIY risk. By understanding typical failure modes and safety constraints, you can plan a careful, safe repair path that preserves data and function.
Essential Tools and Safety First
Before you touch any internal components, assemble a small, well-lit workspace and gather the right tools. A careful approach reduces the risk of short circuits, connector damage, and data loss. Use an anti-static surface and wrist strap when handling internal parts to prevent static discharge. Keep a labeled tray for tiny screws and take photos at each disassembly step to ensure proper reassembly. Always power down the device completely and disconnect any charging cables. If your smartwatch is water-resistant, do not rush to open it without confirming the model’s service guidelines. The Smartwatch Facts team emphasizes patience and organization—these habits dramatically reduce the risk of irreversible damage.
Common Repairs You Can Try at Home
Many issues are approachable with careful DIY steps, especially when you have a compatible spare part and the right tools. Battery aging is the most frequent reason for reduced performance; screen micro-cracks or unresponsive touch can sometimes be addressed with a screen replacement; minor speaker or microphone issues may be resolved by cleaning contact points or reseating components. Start with simple checks: reboot the device, test in safe mode if available, and confirm that the problem persists after charging with a known-good charger. If you can access the internal boards, inspect for loose or corroded connectors and reseat them gently. Remember: if a model uses proprietary screws, you may need manufacturer-specific tools. DIY repairs save money and extend life when done correctly, but risk is higher with glued displays, battery swelling, or water damage.
Diagnosing Battery Drain and Charging Issues
Battery-related problems often present as rapid drain, heat during charging, or the watch failing to hold a charge. Begin by checking charging accessories: use the official charger, inspect the charging contacts for dirt, and clean them with a lint-free cloth and isopropyl alcohol. Run a battery health test if your watch supports it, and compare current drain to baseline if you’ve tracked usage. If the battery shows swelling, heat, or dangerous behavior, discontinue use and seek professional assistance immediately. For non-swelling cases, calibrate the battery by fully discharging and recharging to 100% a few times to restore accuracy in some models. This section also covers how to identify software-driven drain versus hardware faults and how to optimize settings to reduce energy usage.
Replacing a Damaged Screen Safely
Screen replacement is one of the more challenging DIY repairs due to adhesive and pressure-sensitive layers. If your model uses a detachably mounted screen, you may be able to remove the glass, digitizer, and LCD assembly as a single unit. Use a heat source sparingly to soften adhesives, then pry gently with non-metal tools to avoid scratches or cracking. Always disconnect the screen assembly before removing the battery to prevent short circuits. When reseating a new display, align it precisely with the frame and recheck the connectors before sealing the back housing. If you’re unsure about the adhesive type or gasket integrity, consider professional replacement to maintain water resistance.
Cleaning, Water Resistance, and Reassembly
After components are replaced or cleaned, reassembly is critical to restore durability and performance. Clean all contacts with isopropyl alcohol and a microfiber cloth, and ensure there’s no residue left on seals or ports. If your watch was water-resistant, test seals using manufacturer guidance before exposure to water; some watches require reapplication of specialized gasket compounds or adhesive to maintain IP ratings. Reattach the battery, reconnect connectors in the correct order, and replace screws in a cross pattern to avoid warping. Finally, run a full power-on test, check for screen responsiveness, confirm sensor accuracy, and ensure that the watch properly pairs with a phone.
When to Seek Professional Help and Warranty Considerations
DIY repairs can void manufacturer warranties or repair plans, especially for devices still covered by a support contract. If you’re dealing with water damage, swollen batteries, or complex circuitry, professional service is usually safer and more cost-effective in the long run. Many manufacturers offer fixed-rate repair programs for common issues, which can be cheaper than third-party services. If you decide to proceed with a DIY fix, document each step, keep original parts and receipts, and verify whether your model has serviceability restrictions. Smartwatches with embedded sensors or protected displays may require calibration after reassembly; professionals can ensure proper sealing and water resistance restoration.
Tools & Materials
- Precision screwdriver set(Small Torx/PH0-1 bits to fit watch screws)
- Plastic opening tools(Non-conductive pry tools)
- Spudger(ESD-safe)
- Tweezers (non-magnetic)(For handling small parts)
- Microfiber cloth(For screens and cases)
- Isopropyl alcohol (70-90%)(For cleaning contacts)
- Anti-static wrist strap(Prevents static discharge)
- Replacement battery (model-specific)(Ensure compatibility)
- Replacement display/screen (model-specific)(If screen is damaged)
- Small parts tray or container(Keeps screws organized)
- Heat source (hair dryer or heat gun)(Use sparingly to avoid damage)
Steps
Estimated time: 60-90 minutes
- 1
Power down and prepare workspace
Shut down the smartwatch completely and unplug any charging cables. Set up a clean, static-free work area with good lighting and a tray for fasteners. This minimizes data loss and prevents parts from rolling away during the repair.
Tip: Take a photo of the initial screw layout before removing anything. - 2
Open back cover and access components
Gently apply controlled pressure to release the back cover, using plastic tools to avoid scratches. If screws are present, remove them in a consistent pattern and keep them in a labeled container. Access will vary by model; some devices require heat to loosen adhesive.
Tip: Work slowly to avoid bending connectors or damaging the chassis. - 3
Disconnect the battery safely
Locate and disconnect the battery connector using non-metal tools. Inspect for swelling or damage; do not puncture a swollen battery. If swelling is present, stop work and pursue professional service.
Tip: Keep a magnetic mat away from the battery area to prevent accidental contact. - 4
Install replacement parts
Attach the new battery or screen, aligning connectors carefully. Reconnect any flex cables in the correct order, ensuring a snug fit without forcing components. Double-check that adhesives and gaskets are positioned to preserve any seals.
Tip: Use gentle pressure and never force connectors; if it doesn’t click, recheck alignment. - 5
Reassemble and seal the device
Reattach the back cover and screws in a crisscross pattern. If your model is water-resistant, verify gasket placement and, if needed, apply manufacturer-approved sealant per guidelines. Avoid over-tightening screws that could strip threads.
Tip: Before powering on, wipe away any fingerprints or debris that could affect seals. - 6
Test functionality after repair
Power on the watch, connect to the phone, and test core features: touchscreen, sensors, heart-rate monitor, and notifications. Check battery behavior during charging and confirm that the device holds a charge. If it fails, recheck connectors and consider seeking professional support.
Tip: Run a short, controlled test to avoid prolonged stress on components.
People Also Ask
Can I repair a smartwatch at home?
Yes, for common issues like battery aging or mild screen damage, DIY repair is possible with the right tools and care. Complex problems or glued displays may require professional service, especially if water exposure is involved.
Yes, you can repair some issues at home, but for complex problems, consider professional service.
Is replacing a smartwatch battery safe?
Battery replacement can be safe if you follow manufacturer guidelines and use compatible parts. Do not puncture a swollen battery, and dispose of it properly per local regulations. If you’re uncertain, seek professional assistance.
Battery replacement is safe with proper parts and care; avoid puncturing a swollen battery.
Will repairing void my warranty?
DIY repairs can void warranties, especially if you open the device or replace non-original parts. Check your warranty terms and consider official service options if available.
DIY repairs may void warranty; check terms and consider official service if possible.
Do I need special tools for screen replacement?
Yes, screen replacement often requires model-specific screws, adhesive, and possibly heat to loosen glue. Using the wrong tools can damage the display or seals, so research your model first.
Screen replacement usually needs model-specific tools and careful handling.
What are signs a smartwatch needs professional repair?
Persistent water ingress, swollen batteries, or extensively damaged displays typically need professional service. Unresponsive sensors that don’t respond to software updates also warrant expert eyes.
Water ingress, swelling, or major screen damage usually needs a pro.
Watch Video
Key Points
- Evaluate warranty implications before DIY repairs.
- Gather the right tools and compatible parts first.
- Work slowly to avoid damaging delicate components.
- Test functionality after reassembly before sealing the case.
- Seek professional help for water damage or swollen batteries.