How to Remove Smart Watch Strap for Charging: A Practical Guide
Learn a safe, practical method to remove your smart watch strap for charging. Step-by-step instructions, tool tips, and maintenance guidance to protect your device and extend strap life.

By following this guide, you’ll safely remove a smartwatch strap for charging and access the back of the case without damage. Use the correct quick-release pins or a spring-bar tool, work on a soft surface, and reattach the strap after charging. Remember, models vary, so consult your manual if pins differ.
Why removing the strap for charging matters
In many smartwatch models, charging contacts or the back of the case sit beneath the strap. If you want a clean connection or a cradle that requires exposure of the back, removing the strap becomes necessary. The decision to remove is largely model-dependent; some devices allow charging with the band in place, others require detachment to avoid charging interference or to access pins. For the best results, plan ahead: lay out a soft mat, gather the recommended tools, and work in a well-lit area. This approach minimizes the risk of scratching the screen or bending lugs.
First, check the user manual or official support page for your model to confirm whether strap removal is required for charging. If the manual notes that the strap should remain attached, skip strap removal and use the charging cradle with the band in place. If removal is recommended or required, understand that modern quick-release straps use concealed pins that remove with a gentle press. Older or sport straps may use small screws or adapters, which take a little more precision to detach. Before you begin, take a moment to map out the parts so you can reassemble smoothly.
During this process, keep the strap parts in a safe, small container or magnetic tray to prevent misplacement. A soft, lint-free cloth is useful for wiping away sweat, oils, or temporary residues from the lugs. If you are dealing with a magnetic charger, ensure the magnets are aligned with the correct side of the back of the watch; misalignment can reduce charging speed and increase wear on the pins. With patience, you’ll reduce the risk of bending lugs or scratching the case during detachment.
According to Smartwatch Facts, a clean, controlled environment helps prevent lost pins and damaged finishes. Gather your tools, choose a quiet workspace, and keep a lid on the parts to avoid misplacement. Be mindful of moisture around the charging area and avoid touching the charging contacts with dirty fingers.
Safety and care are essential. If you feel unsure about your model’s mechanism, stop and consult the official support site. Following model-specific guidance is the best way to protect seals, sensors, and water resistance while you perform strap removal for charging.
tip: null
Tools & Materials
- Small pin or spring-bar tool(Essential for quick-release straps and some spring bars.)
- Watch strap removal tool (optional)(Helpful for stubborn or screw-in connectors.)
- Soft microfiber cloth(Used to clean lugs and avoid scratches.)
- Flat, clean workspace(A padded mat helps prevent slips and damage.)
- Small dish or magnetic tray(Keeps pins, screws, and small parts organized.)
- Isopropyl alcohol wipes (optional)(For quick cleaning of metal surfaces after detachment.)
Steps
Estimated time: 15-25 minutes
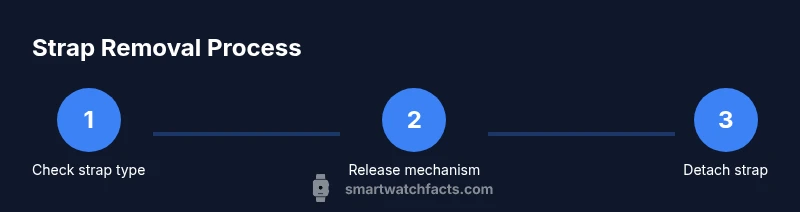
- 1
Identify strap release mechanism
Inspect the strap ends near the lugs to determine whether you’re dealing with quick-release pins, spring bars, or screws. Quick-release pins are often a small lever or button you press; spring bars require compressing the bar; screws need a tiny screwdriver. Knowing the mechanism informs your tool choice and reduces trial-and-error damage risk.
Tip: Take a flashlight or magnifier if you’re unsure which mechanism you have. - 2
Gather the right tools
Lay out the tools you’ll need on your soft workspace: a spring-bar tool or pin tool for quick-release pins, a microfiber cloth for surface care, and a dish to hold small parts. If you’re dealing with screws, have the correct tiny screwdriver handy. Having everything ready minimizes the chance of dropping parts on the floor.
Tip: Check that tools are clean and dry to avoid transferring oils to the lugs. - 3
Remove one end of the strap
With the watch face down on the microfiber cloth, locate the release mechanism on one strap end. Press or compress the pin/lever to free the attachment and slide the strap away from the lug in a single smooth motion. Keep pressure gentle to avoid bending the lug.
Tip: Detach slowly and keep your hand steady to prevent slips. - 4
Detach the other end
Repeat the process on the opposite strap end. If the strap is stubborn, apply a little more pressure on the release while maintaining a steady, straight pull. Do not twist the strap, as this can damage the lug or seal.
Tip: If a screw is involved, back the screw out incrementally rather than forcing it. - 5
Inspect and clean the contact area
With the strap removed, inspect the lug holes and pins for burrs or wear. Wipe away oils or dust from the contact area so the back of the watch sits flat on the charger. This reduces the risk of poor electrical contact and uneven charging.
Tip: A small brush or microfiber cloth works well for dust in tight corners. - 6
Place the watch on the charger (bare back)
If your model requires bare-back charging, position the watch so the charging contacts align with the cradle’s magnets or connectors. Ensure the watch sits securely without tilting. Avoid moisture on the charging surface and confirm the charger is powered.
Tip: Double-check alignment; a slight mismatch can slow charging. - 7
Reattach the strap after charging and test
Once charging completes or reaches a safe level, reattach the strap by aligning the lugs and pressing until you hear a click. Confirm both ends are secure by gently tugging on the strap. Clean any residue and store tools securely.
Tip: Test-fit before wearing to ensure the strap is seated properly.
People Also Ask
Is removing the strap necessary to charge every smartwatch?
No. Some watches charge with the strap attached, while others require detaching to access back contacts. Check your model’s manual for model-specific guidance.
Not every model requires it; verify with the manual for your device.
Will removing the strap affect warranty?
Generally, strap removal done carefully using manufacturer-approved methods does not void warranty. Refer to your warranty terms and official support if unsure.
It usually won’t affect your warranty if you follow official guidance.
What tools do I need for strap removal?
Commonly a small pin or spring-bar tool is enough; some straps need a tiny screwdriver or removal tool. Use clean, dry tools and avoid metal scrapes on the case.
A small tool and a clean workspace are usually all you need.
What if the strap is stuck or tight?
Don’t force it. Re-check the release mechanism, clean the pins, and apply gentle pressure. If still stuck, consult support for model-specific guidance.
Don’t force it—stop and get help if needed.
Can I charge with the strap on?
Some models support charging with the strap attached. Check your manual or manufacturer guidance to confirm.
Check the manual to see if your watch supports charging with the strap on.
How do I reattach the strap after charging?
Align the lugs, insert the pins, and press until you hear a click. Then gently tug to confirm a secure fit.
Make sure it clicks securely before wearing.
Are there different strap types I should know?
Yes. Quick-release pins, spring bars, and screws are common. Your model will determine which method you’ll use.
There are different strap attachment types depending on the model.
Watch Video
Key Points
- Detach carefully using the correct mechanism
- Keep your workspace organized to avoid losing tiny parts
- Charge with the bare back only if required by your model
- Reattach and test fit before wearing again