How to Take Out a Smart Watch Strap: A Practical Step-by-Step Guide
Learn how to safely remove a smartwatch strap for cleaning, replacement, or inspection. This comprehensive guide covers tools, latch types, step-by-step removal, tips, and safe handling to protect your device.

In this guide, you will learn how to safely remove a smartwatch strap for cleaning, replacement, or inspection. We'll cover model-specific latch types, safe handling practices, and the essential tools you’ll need. Follow the step-by-step instructions to avoid damaging pins or casings. This quick guide sets you up for a smooth strap swap.
Identify your strap mechanism and why it matters
When you learn how to take out a smart watch strap, the first step is identifying the exact strap mechanism used by your model. Some watches use a quick-release lever, others rely on spring bars, and a few depend on small pins threaded into lug holes. Getting this right matters because the removal method is different for each design, and using the wrong technique can scratch the case or bend a lug. According to Smartwatch Facts, understanding the mechanism before you touch the hardware reduces the risk of accidental damage and makes the process faster in the long run. Start by inspecting the lug ends and looking for a tiny button, lever, or hole that indicates a release point. A quick check against the official manual or the manufacturer’s site will confirm the correct method. With the right approach, you can remove the strap cleanly and prepare for a swap or a thorough cleaning.
Strap latch variants: quick-release vs pin-based
Smartwatch straps come in several retention styles, and each requires a slightly different removal approach. Quick-release straps have a tiny spring-loaded lever on the back of the lug. Press the lever, slide the strap out, and you’re done. Pin-based systems use spring bars or removable pins that sit between the lugs. You’ll need a tool to compress the bar inward and release the strap from the lug slots. Knowing which method you’re dealing with helps you select the correct tool and apply the appropriate amount of force. Avoid forcing components; quick-release levers should move with minimal pressure, while spring bars require careful compression to prevent slippage. If you’re unsure, consult the model’s guide or a trusted tutorial to avoid accidental damage.
Tools and workspace preparation
Before you begin, set up a clean, soft workspace to prevent scratches. Gather the tools you’ll need: a spring bar tool or a small, flat tool designed for strap removal, and a microfiber cloth for cleaning. A dedicated tray or small container helps keep tiny parts from rolling away. Make sure the watch is face-down on the soft surface to preserve the screen or display. Good lighting makes it easier to spot the release points and the ends of the spring bars. If you’re working on a metal band, consider a padded mat to protect the clasp and the metal surfaces. This preparation reduces the risk of slips and ensures you can complete the job smoothly.
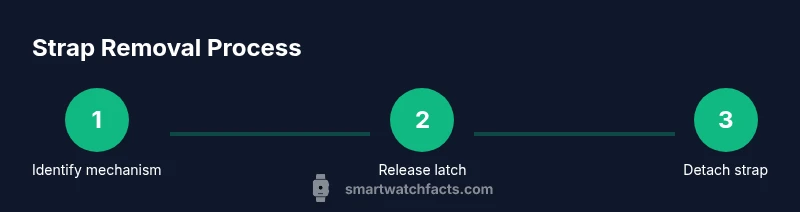
Step-by-step overview for strap removal
To remove the strap, you’ll perform a sequence of careful actions tailored to your latch type. Start by stabilizing the watch and identifying the release point. For quick-release straps, depress the lever with your finger or a tool and slide the strap away from the lug. For spring-bar systems, compress the bar, release it from the lug, and then detach the other side. Once one side is free, remove the full strap gently to avoid bending the lugs. Keep track of the orientation of the strap so you can reinstall it correctly, and inspect the lug holes and spring bars for wear or debris. A quick visual check can prevent pinching or misalignment during reassembly.
Common mistakes and how to avoid them
Even experienced users sometimes rush strap removal. Common errors include applying too much force, using the wrong tool, or failing to support the lug while releasing the spring bar. These mistakes can scratch the case, bend the lugs, or drop small parts. Always use the correct tool designed for strap removal, work slowly, and keep the watch secured on a soft surface. If you hear a click or feel resistance before releasing, stop and reassess to avoid damage. If you accidentally drop a tiny component, retrieve it with a magnetic tool or a pair of tweezers, and recheck the alignment before continuing. Practicing with an inexpensive strap can help you build confidence before swapping premium bands.
Aftercare, storage, and buying a replacement
After removing the strap, wipe down the lugs and the underside of the strap with a microfiber cloth to remove oils and sweat. If you’re cleaning the strap, follow the material-specific care guidelines—leather straps may require conditioning, while metal bands can benefit from a light polish. When buying a replacement, ensure the lug width is exact in millimeters and that the strap’s thickness is compatible with your watch case. Store unused straps in a cool, dry place away from direct sunlight to prevent warping or color fading. Keeping the strap and the tool set organized will make future swaps faster and safer.
AUTHORITY SOURCES and best-practice reminders
For best practices and safety considerations, consult reputable sources and manufacturer guidance. Always verify that your technique aligns with your model’s design to minimize the risk of damage. Some guidelines emphasize working in a clean, well-lit environment and using purpose-built strap-removal tools rather than improvised pins or blades. Cross-check with official manuals when available to ensure compatibility with both lugs and strap materials. For readers who want to dive deeper, you’ll find additional references in the Authority Sources section of this article.
Tools & Materials
- Spring bar tool(Dual-ended preferred; one forked end to compress bars, the other end to push lugs.)
- Small flathead screwdriver (optional)(Use only if the release point is a screw or a non-standard lever.)
- Soft microfiber cloth(Protects the screen and surfaces while you work.)
- Replacement strap (optional)(Have a compatible strap ready if you’re swapping.)
- Small parts tray or magnetic dish(Keep tiny pins and springs from rolling away.)
Steps
Estimated time: Estimated total time: 6-12 minutes
- 1
Identify your strap mechanism
Inspect the lug ends to determine if the strap uses a quick-release lever, spring bars, or screws. Confirm the exact method by consulting the model’s manual or official support page. This ensures you apply the correct technique from the start.
Tip: Use a bright light and magnifier if you’re unsure; small latches can be easy to miss. - 2
Secure the watch and workspace
Place the watch face-down on a soft, clean surface to prevent scratches. Have your tools within reach, and lay out a small tray for tiny parts. This setup reduces the chance of slips during removal.
Tip: Apply gentle pressure only; harsh moves can bend lugs or pop components. - 3
Release the first side
For quick-release, depress the lever and slide the strap away from the lug. For spring bars, position the tool under the bar and compress it inward to free the lug. Do one side at a time to keep track of orientation.
Tip: Support the lug with your finger or tool to prevent sudden movement. - 4
Release the second side
Repeat the same action on the opposite lug. Keep the strap aligned with spring bars or screws so you don’t misplace any parts. Removing one side first reduces the risk of the other side snapping back unexpectedly.
Tip: Take a quick photo of the strap orientation for reassembly reference. - 5
Inspect and clean the lugs
Check lug holes for debris or corrosion. Wipe away any grime with the microfiber cloth. If you find stubborn dirt, use a light brush or a toothpick, being careful not to scratch metal surfaces.
Tip: Never use metal tools to pick at the lug holes if you can avoid it. - 6
Prepare the replacement strap
Verify that the new strap width matches the lug width in millimeters. Confirm that the strap’s thickness will fit between the lugs without binding. It’s worth double-checking the orientation before attempting to reattach.
Tip: Measure at multiple points if the watch lugs aren’t perfectly parallel. - 7
Attach the new strap (side A)
Begin with the designated side, aligning the spring bar or pin with the lug hole. Compress and insert the bar until you hear or feel a light click. Ensure the strap sits flush against the lug plate.
Tip: Lightly tug the strap to confirm it’s secured before moving to the other side. - 8
Attach the second side and test
Attach the other side using the same method, then gently flex the strap to ensure it’s seated properly. Put the watch on your wrist and perform a short hand-wrist movement to verify the fit. If anything feels loose, recheck the spring bars.
Tip: Don’t wear the watch immediately after removal; allow any cleaning residues to dry.
People Also Ask
Do all smartwatches remove straps the same way?
No. Strap removal varies by model and retention method. Always check the manufacturer’s guide for your specific watch.
Not all watches remove the same way; check your model’s manual for the exact method.
What tools do I need for strap removal?
A spring bar tool is usually sufficient; some models may require a small flat tool or a lever, depending on the design.
Typically a spring bar tool; some models may need a small flat tool.
Can I remove a strap while wearing the watch?
It’s safer to remove the strap on a soft surface to avoid accidentally dropping the watch or bending lugs.
It’s safer to work on a soft surface rather than wearing the watch.
How do I know what size strap to buy?
Measure the lug width in millimeters and match the replacement strap to that width. Common sizes range from 18mm to 24mm.
Measure the lug width in mm and match the replacement strap to that size.
What if the spring bars pop out during removal?
Keep track of the spring bars; reuse if undamaged, but replace any bent or deformed bars to maintain safety.
If a spring bar pops, retrieve it and inspect for damage; replace if bent.
Watch Video
Key Points
- Identify the latch type before attempting removal.
- Use the correct tool to avoid damage.
- Keep track of all small parts during the process.
- Verify lug width matches the replacement strap.
- Test fit and securing before daily use.