Screen Replacement for Smart Watch: A Practical How-To Guide
Learn to replace a cracked or malfunctioning smartwatch screen with a proven, step-by-step approach. Get tools, safety tips, and troubleshooting from Smartwatch Facts.

By the end of this guide you will be able to replace a cracked or non-responsive smartwatch screen safely and effectively. You'll learn how to assess screen damage, select compatible replacement parts, gather the right tools, and follow a clear step-by-step process to minimize risk and preserve device integrity. According to Smartwatch Facts, proper preparation and caution are essential for successful screen replacement.
Why screen replacement for smart watch matters
Screen damage is among the most noticeable issues on smartwatches, affecting touch response, visibility, and water resistance. Even minor cracks can allow dust and moisture to penetrate, accelerating corrosion of delicate circuits. Replacing the screen rather than buying a new watch can save money and extend your device’s life, especially if you rely on health sensors or GPS features. In many cases, you’ll find compatible replacement assemblies that preserve the original touchscreen, display brightness, and digitizer performance. Smartwatch Facts emphasizes that a careful repair approach preserves overall durability and can maintain resale value if you decide to upgrade later.
Before you begin, assess the extent of the damage: surface cracks that don’t affect touch lanes are easier to repair than shattered panels that disrupt the digitizer. If the frame or housing shows serious deformation, replacement costs rise and repairs become riskier. Mind the warranty: many manufacturers restrict service if you tamper with internal components. If you’re outside warranty, a guided screen replacement can be a practical DIY project when you follow safety steps and use model-appropriate parts.
For shoppers and enthusiasts, understanding common failure modes helps you decide whether to repair or replace the entire watch. If the device is feature-rich but outdated, you may also weigh the cost of maintenance against a new model with improved battery life and sensors. The Smartwatch Facts team recommends evaluating the total cost of ownership, including potential future repairs, to decide if screen replacement is the right move for your situation.
Screen types and compatibility
Smartwatches use different display technologies, including OLED and LCD, each with its own brightness, color accuracy, and power characteristics. Replacement screens must match the original panel type, resolution, and digitizer compatibility to ensure touch responsiveness. In many models, the screen assembly includes the glass, digitizer, and frame bonded together, which means you’ll replace the entire unit rather than a single component. If you mix components from different generations, you risk a loose fit, misalignment, or degraded performance. Always verify model numbers, serials, and part compatibility with the seller before purchase. Related terms you’ll encounter include bezel fit, adhesive type, and sensor alignment, all of which influence the final outcome.
For the best results, choose OEM screens when available, or reputable aftermarket assemblies that explicitly state compatibility with your device model. Some screens require strong adhesive and careful alignment to avoid gap lines or air bubbles. If you’re unsure about the panel type, consult manufacturer documentation or trusted repair guides. Remember that a compatible screen is not only about size; it must also accommodate the watch’s proximity sensors, front camera (if present), and touch digitizer alignment for precise input.
Smartwatch Facts’s analysis shows that choosing the right replacement screen is the foundation of a successful repair. Start by confirming your model number and reading seller notes about fitment, then compare warranty terms and return policies to minimize risk if the part doesn’t meet expectations.
Tools and protective gear you’ll need
A successful screen replacement requires a precise toolkit and a clean, static-free workspace. The essential gear includes a precision screwdriver set, plastic opening tools, and an ESD-safe wrist strap to prevent static discharge from damaging delicate electronics. You’ll also want a replacement screen/digitizer assembly that matches your model, along with adhesive strips or gasket tape to reseal the device and restore water resistance where applicable. Cleaning supplies such as isopropyl alcohol (70-90%) and lint-free cloths help remove old adhesive residue without leaving fibers behind. Optional items like a suction cup, fine-tipped tweezers, and a heat source can simplify stubborn screen removal but should be used with caution to avoid damaged housings or screens.
Plan your workspace: use a magnetized tray or small containers to keep screws organized by location, and work on a non-scratch mat to prevent component damage. Wear safety glasses if you anticipate tiny glass shards, and keep a dedicated area free of dust. Following these steps reduces the risk of losing tiny parts or introducing contaminants during reassembly.
As you prepare, assign a role to your tools: the screwdriver handle acts as the primary driver, while the spudger and opening tools perform lifting and prying without gouging the frame. The adhesive materials come last, so you don’t contaminate them. The right tooling reduces the chance of accidental damage and helps you complete the repair more efficiently.
Planning your repair: model numbers and parts
Start by locating the exact model number of your smartwatch, typically found on the back of the case or in the device settings. This number is critical for ordering the correct replacement screen assembly—without it, you risk receiving a part that doesn’t fit or functions poorly. When possible, buy from sellers who provide compatibility guarantees and clear photos of the actual part. If the model number is ambiguous, contact customer support with your device’s serial or purchase details.
Check whether the replacement screen includes the digitizer and frame; in many cases, the glass and digitizer come as a single bonded unit. If you already have an adhesive strip, ensure it’s rated for the device’s operating temperature and water resistance rating. Stock up on extra adhesive and edge gaskets if your watch relies on a seal to keep out moisture. Finally, consider timing: if the watch is used for critical health monitoring, allocate additional time for calibration and sensor tests after reassembly.
Smartwatch Facts suggests creating a quick parts checklist before you start, so you don’t interrupt the process mid-repair. A well-planned purchase reduces the risk of delays and ensures you’re prepared for the most common fit issues.
Safety first: handling batteries and adhesives
Openings near the battery require extra care because lithium-ion cells can pose fire and chemical hazards if punctured or crushed. Always power off the watch and disconnect charging peripherals before you begin. Use non-metal tools and keep metal parts away from exposed battery terminals to prevent short circuits. When detaching the battery connector, work slowly and avoid bending cables sharply; a gentle lift with a plastic tool is usually sufficient. If the battery shows swelling or signs of damage, stop the repair and seek professional service.
Adhesives used for sealing the screen are designed to create a water-tight bond but must be handled carefully to avoid skin contact and inhalation of fumes. Work in a well-ventilated area, and dispose of damaged materials according to local regulations. Before you apply new adhesive, confirm the surface is clean and dry to maximize bond strength. If you’re unsure about the adhesive choice, opt for manufacturer-approved options recommended for your model.
Following proper safety protocols reduces risk and protects you, your watch, and nearby components from accidental damage. A considered approach to battery handling and sealing materials helps ensure a durable, long-lasting screen replacement.
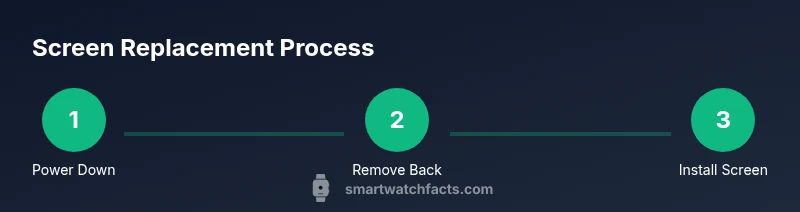
Step-by-step overview (high-level): what you’ll do in practice
A screen replacement is a multi-stage operation that typically follows a precise order: power down and prepare, remove back housing and battery, detach the old display assembly, clean surfaces, place new adhesive, install the new screen, reconnect the battery, and reassemble the device. This high-level overview helps you anticipate the sequence and identify potential sticking points before you start.
Each watch model has its own nuances, so you should consult model-specific guides when available. If you’re new to electronics repair, begin with a less complex device to build confidence before tackling a more advanced screen swap. Keeping screws labeled by location and maintaining a clean, dust-free environment are universal best practices that reduce the chance of misalignment or lost components.
As you proceed, test at logical checkpoints: verify touch responsiveness after seating the digitizer, confirm brightness levels, and ensure the new glass sits flush with the housing. These checks help you detect misalignment early rather than after final assembly.
Common mistakes and how to avoid them
One of the most common errors in screen replacement is using the wrong adhesive or not removing all old residue, which leads to poor bonding or screen lift. Another frequent issue is inadequate support for the display during reassembly, resulting in gaps or misalignment. Avoid forcing components; watch models with delicate digitizer cables can be damaged by excessive tension. If you’re unfamiliar with a watch’s adhesive strategy, pause and review a model-specific guide or video before applying heat to soften adhesives.
Additionally, neglecting static discharge can permanently damage sensors and controllers. Always ground yourself with an anti-static strap and work on an insulated surface. Finally, don’t ignore calibration needs: a new screen often requires touchscreen calibration and display alignment adjustments to function perfectly.
By planning, checking fit, and following model-specific notes, you’ll minimize the risk of common mishaps and improve your chances of a successful screen replacement.
Testing and calibration after replacement
Once the new screen is secured and the device is reassembled, power it on to verify core functionality: display signal, touch response, and sensor activity. If the touchscreen is unresponsive or off-center, recheck the digitizer connections and seating of the screen assembly. Calibrating the digitizer may be necessary for precise input, and some devices require a factory reset sequence after a display swap to harmonize software with the new hardware.
During testing, check for ghost touches, brightness consistency, color accuracy, and edge-to-edge touch sensitivity. If you notice color shifts or dim regions, ensure the display cable isn’t pinched and reseat any connectors. Clean any fingerprint smudges with a microfiber cloth to retain clarity, and reattach any shields or bezels that influence touching accuracy.
Smartwatch Facts emphasizes documenting the process and keeping a record of any anomalies for future reference or warranty inquiries.
Maintenance after replacement and long-term care
To maximize the lifespan of your replacement screen, avoid exposing the watch to extreme temperatures, direct sunlight, or high humidity. Regularly inspect the adhesive areas for loosening edges and reseal if needed, especially after cleaning or heavy use. Keep the face clean with a soft cloth, avoiding abrasive cleaners that could scratch or dull the glass. If you wear the watch during workouts or water activities, verify the water-resistance seals after reassembly and perform a basic splash test when safe to do so.
Software updates can influence display performance, so keep the device’s firmware current and monitor sensor readings for any anomalies. If you notice reduced brightness, dead touch zones, or unusual color variation, perform a thorough recheck of the screen alignment and frame integrity. Routine maintenance helps sustain a reliable, long-lasting screen replacement.
Authority sources and safety guidelines
This guide references best practices from established repair authorities and safety standards. For consumer rights and repair safety principles, see the FTC at https://www.ftc.gov and NIST at https://www.nist.gov for general electronics safety guidelines. For hands-on repair workflows and screen replacement specifics, consult reputable repair publications such as https://www.ifixit.com. Always prioritize model-specific documentation from the manufacturer and use approved parts to minimize risk.
What to do if the screen replacement isn’t working as expected
If the new screen fails to function after assembly, step back and perform a targeted diagnostic. Revisit connections for the digitizer, LCD, and battery; a loose cable is a common cause of continued failure. Verify that the display’s backlight is active and that there are no short circuits across metal components. If issues persist after reassembly, consider seeking professional repair services or using manufacturer-supported warranty channels. Smartwatch Facts recommends documenting the symptoms and steps taken to facilitate support requests.
Tools & Materials
- Replacement screen/digitizer assembly(Match model and serial number exactly; available as OEM or reputable aftermarket kits)
- Precision screwdriver set(Include small Torx and pentalobe bits appropriate for your watch)
- Plastic opening tools / spudger(Non-conductive tools to avoid scratches)
- ESD-safe wrist strap(Prevents static damage to electronics)
- Adhesive strips or gasket tape(Restore seal; ensure compatibility with model)
- Fine-point tweezers(Handling tiny connectors and cables)
- Isopropyl alcohol (70-90%) and lint-free cloth(Clean surfaces before bonding)
- Optional: suction cup(Helps lift glass on certain models)
- Optional: heat source (heat gun or hair dryer)(Softens adhesive on some designs)
- Optional: microfiber cloth(Dust-free cleaning)
- Optional: anti-static mat(Organizes workspace)
- Magnetic parts tray(Keeps screws organized by location)
Steps
Estimated time: 60-90 minutes
- 1
Power down and prep workspace
Turn off the watch and disconnect charging. Remove the band and place the device on a static-free mat. Clear a small area for screws and tools and ensure good lighting for visibility.
Tip: Keep screws in labeled containers to avoid mixing locations. - 2
Remove back case screws
Use the appropriate precision screwdriver to remove the back cover screws without forcing any parts. Place screws in a labeled tray by their position to simplify reassembly.
Tip: Work slowly and keep track of screw length; mismatched screws can damage threads. - 3
Disconnect the battery connector
Gently pry up the battery connector with a plastic tool to disconnect power safely. Do not bend the cable sharply or twist connectors.
Tip: Avoid touching metal parts to prevent short circuits. - 4
Detach the display assembly
Pry the display frame away from the body to expose the digitizer cables. Keep the screen aligned to avoid bending connectors.
Tip: Support the screen with your non-dominant hand to prevent bending. - 5
Remove the broken glass or old display
If glass is cracked, use a plastic tool to carefully separate the glass from the digitizer and frame. Avoid forcing the panel, which may crack internal components.
Tip: Do not apply excessive heat unless necessary and model-specific guidance allows it. - 6
Clean frame and inspect for damage
Remove adhesive residue with isopropyl alcohol and a lint-free cloth. Inspect for chips or warping that could affect fit or seal.
Tip: A clean surface improves adhesion and reduces air gaps. - 7
Prepare replacement screen and adhesive
Unpack the new screen assembly and apply the recommended adhesive strips along the frame. Align the panel in the frame before any bonding occurs.
Tip: Test-fit without adhesive to confirm alignment before bonding. - 8
Install the new screen
Seat the replacement screen into the frame, aligning connectors with care. Reconnect the digitizer and LCD cables in their original positions.
Tip: Use tweezers to handle small connectors and avoid bending cables. - 9
Reconnect battery and reassemble
reconnect the battery, then reassemble the back housing and any shields. Ensure seals or gaskets sit evenly along the edge.
Tip: Don’t overtighten screws; snug is usually sufficient. - 10
Power on and test
Power up the watch and test display, touch response, brightness, and sensor calibration. If any issue appears, recheck connections and seating.
Tip: Run a quick calibration routine if the device prompts you. - 11
Final fit and seal
Check for flush seating around the bezel and verify water resistance ratings where applicable. Clean the screen and reattach the band.
Tip: Ensure there are no gaps that could admit moisture. - 12
Document and monitor
Note the model, replacement part, and date of repair. Monitor device performance over the next few days for any anomalies.
Tip: Keep a record in case future warranty or service is needed.
People Also Ask
Is screen replacement worth it for a smartwatch?
Replacing a smartwatch screen is often cost-effective when the watch remains otherwise functional and under warranty coverage. If parts are scarce or the watch is older, weigh the repair cost against buying a new model. Consider long-term use and sensor features when deciding.
Replacing the screen can be worthwhile if the watch still meets your needs and parts are readily available; otherwise, compare costs with a new model.
Can I replace the screen myself or should I go to a repair shop?
DIY screen replacement is possible with the right tools and careful attention to model compatibility. If you’re not comfortable with electronics or the device is under warranty, a professional repair may be safer and preserve warranty terms.
You can do it yourself if you have the right tools and follow a trusted guide, but consider a pro if you’re unsure.
What tools are essential for screen replacement?
You’ll need a precision screwdriver set, plastic opening tools, an ESD wrist strap, a replacement screen assembly, and adhesive strips. Optional items include a suction cup, fine tweezers, and a heat source for stubborn assemblies.
Essential tools are a screwdriver set, plastic tools, ESD strap, replacement screen, and adhesive; add others as needed.
How do I know the new screen is compatible?
Confirm the exact model number and check the replacement part’s compatibility notes. Match the digitizer and LCD configuration, frame size, and connector types. If in doubt, consult the seller or manufacturer documentation.
Check the exact model and part compatibility and confirm connector types match.
What should I do if the touchscreen stops working after replacement?
Recheck all connectors for the digitizer and LCD, reseat cables, and ensure the display is not pinched. Calibrate the digitizer if prompted, and test after a reboot. If issues persist, consult a professional repair service.
If the touch doesn’t work, reconnect cables and calibrate; seek professional help if needed.
Can a screen replacement affect water resistance?
Yes, improper sealing can compromise water resistance. Use manufacturer-recommended adhesives and seals, and verify seals after reassembly. If you’re unsure, avoid submersion tests until you’re confident in the seal.
A poor seal can reduce water resistance; ensure proper adhesive and seals are used.
Watch Video
Key Points
- Verify model compatibility before purchasing parts.
- Work in a dust-free, organized workspace.
- Test touchscreen and display after reassembly.
- Use proper adhesive and calibrate as needed.
- Consult official guides if unsure.