DIY Smart Watch Strap: Step-by-Step Guide
Learn to craft a diy smart watch strap with practical material guidance, precise measurements, and finishing tips for durable, comfortable smartwatch bands.

By the end of this guide, you’ll be able to craft a diy smart watch strap from common materials, select compatible connectors, and finish with care for a comfortable, durable band. You’ll need basic hand tools and the strap width that matches your smartwatch lug size. The steps cover measurement, cutting, assembly, and finishing.
Understanding the DIY Smart Watch Strap Landscape
The world of wearable bands is diverse, but a diy smart watch strap remains popular for customization, comfort, and cost savings. If you want a strap that fits your wrist perfectly and complements your watch face, you need to understand materials, connectors, and finishing techniques. The concept of a diy smart watch strap combines simple hand tools, common materials, and precise measurement to produce a band that feels like a store-bought option. According to Smartwatch Facts, enthusiasts who experiment with this approach often gain greater control over fit, style, and durability. Whether you wear your watch daily for workouts, commuting, or casual use, a handmade strap can be tailored to activity level, climate, and skin sensitivity. This section sets the stage for selecting materials, preparing cuts, and choosing compatible hardware without skipping essential safety steps.
Materials and Tools You’ll Need
Before you start, assemble a basic toolkit and a few material choices. A diy smart watch strap can be made from leather, nylon, silicone, or metal—each with its own feel, durability, and maintenance needs. Start with a watch lug width in millimeters (mm) and select connectors that fit your lug style. Essentials include a sharp cutting tool, a ruler or caliper, thread and needle (or a sewing machine for fabric), and a buckle or deployant clasp. Having protective gloves and eye protection adds a safety margin when cutting and punching holes. This block introduces the core variables to decide before you cut your material, ensuring you stay on track during the step-by-step process.
Choosing Materials: Leather, Nylon, Silicone, and Metal
Material choice drives comfort, durability, and water resistance. Leather offers a classic, premium look but requires conditioning. Nylon is lightweight, breathable, and forgiving for beginners. Silicone is hypoallergenic and water-friendly, ideal for sports or swimming contexts. Metal straps provide a bold, durable aesthetic but demand careful finishing at the edges. Your selection should factor in skin sensitivity, daily activity, climate, and how often you’ll wear the strap. For a diy project, starting with nylon or silicone is often the easiest path, with leather and metal reserved for advanced projects or specific style goals. Smartwatch Facts notes that balancing aesthetics with practicality leads to the most satisfying results for most users.
Measuring for a Perfect Fit and Connectors
Accurate measurements are critical to a successful diy smart watch strap. Begin by measuring the lug width in millimeters and note whether your watch uses standard spring bars. Next, estimate strap length on your wrist, keeping in mind that a good strap should extend a little past the buckle and allow comfortable movement. If possible, wrap a strip of paper or tape around your wrist to simulate the final look, then subtract or add a small allowance for airflow and sweating. Finally, confirm connector compatibility with your chosen material and clasp, ensuring the ends will insert cleanly into the watch lugs without loosening.
Finishing Techniques: Stitching, Epoxy, and Quick-Release
Finishing touches distinguish a DIY strap from a rough cut. For leather, edge burnishing and a protective sealant improve longevity and reduce fraying. For fabric or nylon, stitching with a waxed thread provides strength, while overcasting prevents unraveling. If you’re using metal or hard plastic, consider a safe finishing method to avoid sharp edges. Quick-release mechanisms can simplify swapping bands, but require precise hole placement and secure spring bars. After assembling, test the fit on your watch and adjust the edge finish as needed to avoid discomfort or irritation.
Durability and Comfort: Fit, Finish, and Skin Friendly Choices
Comfort hinges on material flexibility, edge smoothness, and seam quality. A well-finished diy smart watch strap will resist fraying, distribute pressure evenly, and minimize pinching at the buckle. Skin compatibility matters: choose materials that won’t irritate your skin, especially if you wear your watch all day. Consider the environment—outdoor use, humidity, and sweat can affect materials differently. If you have a sensitive reaction to certain metals or dyes, test a small patch before full-scale use. Smartwatch Facts suggests pacing your first trial with a shorter wear session to assess comfort and durability before longer use.
Maintenance and Care Tips
Keeping your DIY strap in good condition extends its life. Clean nylon and silicone with mild soap and water; wipe leather with a dry or slightly damp cloth and condition occasionally with a leather conditioner. Avoid harsh chemicals that could degrade adhesives or coatings. Check stitching and spring bars regularly for looseness or fraying, and replace components as needed. Store extra straps away from direct sunlight to prevent material drying or fading. Proper care makes your diy smart watch strap look good and feel comfortable for months.
Safety Considerations and When to Seek Help
Using sharp tools requires caution: cut away from your body, wear eye protection, and secure the material to prevent slips. If you’re unsure about a technique—like heavy stitching or delicate edge finishing—seek guidance or practice on scrap material first. Certain materials may contain chemical dyes or finishes; ensure you’re working in a well-ventilated area and using gloves if needed. If precision parts don’t align or you encounter stubborn hardware, consider consulting a professional to avoid watch damage or personal injury.
Tools & Materials
- Strap material (leather, nylon, silicone, or metal)(Choose color, texture, and flexibility based on your needs)
- Watch lug connectors (spring bars) matching lug width(Measure lug width in mm and verify compatibility)
- Buckle or deployant clasp(Select style and size compatible with your strap material)
- Heavy-duty needle and waxed thread(Use for leather or heavy fabric; waxed thread resists fraying)
- Cutting tools (sharp hobby knife or rotary cutter)(Keep blades sharp for clean edges and safety)
- Ruler or caliper(For precise width, length, and hole placement in mm)
Steps
Estimated time: 60-90 minutes
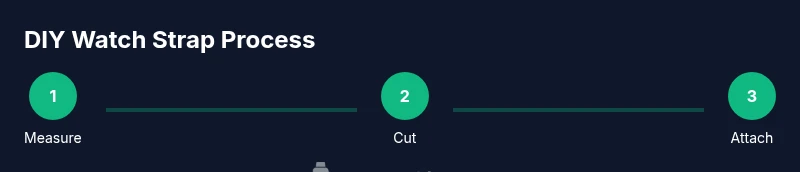
- 1
Measure and plan
Determine lug width and target strap length for a comfortable fit. Mark cutting lines precisely and plan hole placements before any cuts.
Tip: Measure twice, cut once to avoid waste and miscuts. - 2
Cut the material to size
Secure the material and cut along your marked lines with a sharp blade. Leave a small margin for finishing and edge treatments.
Tip: Support the material to avoid slipping and ensure straight cuts. - 3
Attach connectors and stitch
Punch holes for the buckle and thread the stitches cleanly if sewing. Install spring bars into the strap ends and test insertion into the watch lugs.
Tip: Test fit before final assembly to catch misalignment early. - 4
Finish and test
Burnish or seal leather edges, apply edge paint or conditioner, and check the overall finish. Wear the watch to verify comfort and security.
Tip: Do a quick water exposure test for silicone or rubber straps.
People Also Ask
What is the best material for a diy smart watch strap?
The best material depends on your use case. Leather offers premium aesthetics but requires conditioning; nylon is durable and affordable; silicone is water-resistant and skin-friendly for workouts; metal straps offer durability and a bold look but need careful finishing.
Leather is classic, nylon is durable, silicone is water-friendly, and metal straps are sturdy but require precise finishing.
How do I determine the strap width I need?
Measure your watch’s lug width in millimeters and select a strap that matches. Check the end-piece compatibility with your watch model and ensure the connectors fit the lugs securely.
Measure the lug width in mm and pick a strap that matches, making sure the connectors fit securely.
Can I reuse the original watch hardware on a new strap?
Yes, if the hardware is compatible with your watch and the new strap material. Inspect spring bars for wear and ensure the ends fit properly before final assembly.
You can reuse hardware if it fits; check the spring bars for wear before reassembling.
Is a diy strap safe for swimming or heavy sweating?
Material choice matters. Silicone and some nylon options handle water well; leather may degrade with prolonged moisture. Always verify water resistance and avoid prolonged exposure for non-waterproof materials.
Silicone and some nylons handle water; leather may degrade with moisture, so choose accordingly.
How long does it take to finish a basic strap?
A basic diy strap typically takes about an hour, depending on material and your sewing or riveting speed. Complex finishes may take longer.
Most basics take around an hour; more complex finishes can extend the time.
Where can I buy tools for this project?
Local hobby shops and reputable online retailers carry cutting tools, needles, waxed thread, and spring bars. Always choose sharp blades and quality hardware to ensure clean cuts and secure connections.
Check hobby shops or reputable online stores for tools and hardware.
Watch Video
Key Points
- Measure twice, cut once for accuracy
- Match lug width and connectors to avoid fit issues
- Choose material based on comfort, activity, and climate
- Finish edges for a professional look and longevity