Glass Replacement for Smart Watch: A Practical How-To
Learn a safe, model-specific approach to glass replacement for smart watch. This guide covers materials, risk factors, and a tested step-by-step process to restore clarity and water resistance.

With glass replacement for smart watch, you can restore screen clarity and waterproofing without buying a new device. This guide shows how to assess damage, choose the right glass, and perform a careful swap. You'll need a precision toolkit, model-specific replacement glass, adhesives, and a clean work surface. Follow the steps, test functionality, and inspect for bubbles or edges.
What glass replacement for smart watch involves
Glass replacement for smart watch is a specialized repair that restores the screen surface, touch responsiveness, and in many cases water resistance. It typically requires removing the cracked glass, cleaning the display, and bonding a new protective layer to the display assembly. The process is model-specific, because different watches use different glass types, backing, and sensor layouts. According to Smartwatch Facts, choosing the correct glass and adhesive is crucial for longevity and screen clarity. In this section, we lay out the high-level steps and considerations so you can decide whether to attempt a DIY swap or hire a technician. Understanding the risks and potential benefits will help you manage expectations about durability, touch sensitivity, and warranty implications.
Understanding glass types used in smart watches
Most modern smart watches use tempered or chemically strengthened glass, with sapphire crystal offering the highest scratch resistance but at a premium price. Some budget models rely on tougher glass compounds that balance durability with cost. When choosing a replacement, verify compatibility with your exact model, including the edge thickness, curvature, and any coatings (e.g., anti-reflective layers). The combination of glass material, adhesive type, and the seal around the display determines how well your device will resist daily wear, fingerprints, and moisture ingress. Smartwatch Facts notes that model-specific glass is critical for maintaining touchscreen responsiveness and visual clarity after replacement.
Assessing damage and deciding on replacement vs repair
Cracks that run through touch sensing or bleed into the LCD are strong signals for replacement rather than simple screen polish. A minor crack on the outer surface may be repairable with proper polishing or an external screen protector, but deeper damage risks poor touch accuracy and inconsistent brightness. Before proceeding, inspect the digitizer for dead zones, purple tint, or color inversion, as these issues affect how well the replacement performs. If the device is under warranty or a service plan, check whether glass replacement is covered to avoid unnecessary costs. In every case, assess the long-term value of repair versus replacement from a cost, risk, and usability perspective.
DIY risks and when to seek professional service
Attempting glass replacement involves handling tiny components, adhesives, and microscopic seals. A wrong peel can detach the digitizer, damage sensors, or compromise water resistance. Professionals have calibrated tools and model-specific glass kits that reduce the risk of misalignment. If you’re not comfortable with fine motor tasks or lack a clean, dust-free workspace, consider professional service. For many users, a certified repair keeps the device color-matched, avoids warranty voids, and ensures tested sealing against moisture.
Preparing your workspace and choosing replacement glass
Choose a clean, well-lit, dust-free table with a static-free mat. Use anti-static gloves and keep all components organized to prevent loss of small screws. Verify that the replacement glass is intended for your exact watch model (check model number, year, and curvature). Keep an eye on adhesives that require precise curing times and cleanroom-like conditions. Having a magnifier or jeweler’s loupe can help you confirm alignment and edge seating before bonding.
Tools, materials, and safety equipment you will need
Gather a model-specific replacement glass, a precision screwdriver set, a case back opening tool or suction cup, a thin plastic pry tool, a spudger, tweezers, isopropyl alcohol, lint-free microfiber cloth, adhesive strips or watch-grade adhesive, and optional heat source for softened adhesives. Wear safety glasses and work in a low-dust environment. Keep a small brush and lint-free wipes on hand to remove dust without scratching the surface. Having spare parts and a labeled tray for screws reduces the chance of misassembly.
The replacement process: an overview (high level)
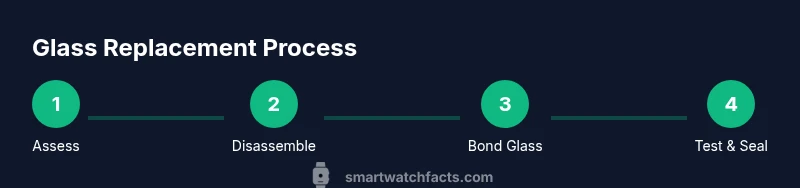
The overall approach is to safely access the display assembly, remove the cracked glass, clean any adhesive residue, align the new glass, apply adhesive, and verify functionality. Each watch model may require different entry points for the display assembly and distinct adhesive types. The key is to maintain clean edges, avoid dust contamination, and ensure a uniform seal around the display. Finally, reassemble the watch and perform a full diagnostic test to confirm that touch, brightness, and color accuracy are correct.
Post-repair testing and quality checks
After reassembly, connect the watch to a charger and verify charging indicators. Test the touchscreen across multiple regions of the display, confirm brightness and color accuracy, and check for ghosting or dead pixels. Submerge or simulate light moisture exposure if you have the means and the rating supports it, but always follow model-specific guidelines. If any issue occurs—such as unresponsive touch in a region or uneven lighting—revisit the seal and alignment. Document the results and keep the repair logs for warranty purposes.
Maintenance, protection, and warranty considerations
Even with a properly replaced glass, avoid intense impact and protect the surface with a tempered screen protector designed for your model. Regular cleaning with a microfiber cloth helps maintain clarity and reduces residue that can affect touch. Review your warranty terms after a glass replacement, as some services may void coverage. If possible, use a protective case and avoid exposing the watch to harsh chemicals or high-temperature environments that can degrade the adhesive bond over time.
Tools & Materials
- Precision screwdriver set (model-specific bits)(PH and Torx bits sized for wearables; ensure fit with case screws)
- Case back opening tool or suction cup(To lift back panels without scratching)
- Plastic pry tools and spudger(Use gentle leverage to avoid cracks)
- Replacement glass (model-specific)(Verify exact model compatibility and curvature)
- Watch-grade adhesive or adhesive strips(Choose low-temperature curing adhesive when possible)
- Isopropyl alcohol (70-99%)(For residue removal and cleaning; use in a well-ventilated area)
- Lint-free microfiber cloth(Dry and lint-free material to avoid fibers)
- Tweezers(Fine-point tweezers for tiny components)
- Anti-static mat or working mat(Reduces static risk; optional but recommended)
- Heat source (optional)(Used to soften adhesive on some models; proceed with caution)
Steps
Estimated time: 45-90 minutes
- 1
Power down and secure
Power off the watch completely. Remove any straps, and place the device on a clean, static-free mat. This prevents accidental taps or short circuits during disassembly.
Tip: Work in a dust-free environment and keep screws organized by size. - 2
Open the back and access the display
Using the appropriate back-opening tool, carefully separate the back cover. Detach any connected flex cables that secure the display assembly, keeping note of their orientation.
Tip: Do not twist or bend connectors; take photos as you go for reference. - 3
Loosen the cracked glass
If needed, gently apply heat to the adhesive area to soften it. Use a precision pry tool to create a gap, then lift the cracked glass without touching the digitizer or sensors.
Tip: Apply minimal force to avoid cracking the display further. - 4
Clean and inspect the edge
Wipe the edge with isopropyl alcohol and a microfiber cloth to remove adhesive residue. Inspect the display edge for nicks or corrosion that could affect bonding.
Tip: A magnifier helps verify there’s no debris left in the seating area. - 5
Align and bond the new glass
Position the new glass exactly over the display, ensuring edge-to-edge alignment. Apply adhesive evenly and press to seat the glass without trapping air.
Tip: Use gentle, even pressure and avoid squeezing adhesive to the sides. - 6
Cure and reassemble
If using a curing adhesive, allow the recommended time before handling. Reconnect any cables, reseal the back cover, and reassemble the watch.
Tip: Do a final wipe-down before closing to prevent dust capture. - 7
Test function and seal
Power up and test touch response, brightness, and color accuracy. Check the waterproof rating with a cautious test per manufacturer guidelines if applicable.
Tip: Document results; this helps with future warranty claims.
People Also Ask
Is glass replacement worth it for an expensive smartwatch?
Glass replacement can be cost-effective if the watch is otherwise functional and the glass failure is isolated. Factor in labor costs and the model-specific glass price. If the device is near end of life, replacement may not be worth it.
Glass replacement can be a good value if your watch is otherwise healthy and the repair avoids buying a new one. Consider labor and glass costs before deciding.
Can I replace glass on any smartwatch model?
No. Replacement glass is typically model-specific due to varying glass thickness, edge curvature, and sealing methods. Verify compatibility with your exact model and year before purchasing.
No, you need model-specific glass and adhesives to ensure a proper seal and touch accuracy.
Will the watch be water-resistant after replacement?
Water resistance depends on the adhesive seal and gasket integrity. Replacement can restore resistance if sealed correctly, but many DIY repairs may not match factory standards. Consider professional service for critical water exposure risk.
It might, but it depends on the seal. A professional check is wise for water resistance.
How long does a glass replacement typically take?
A typical glass replacement can take about 60-120 minutes for an experienced technician, depending on model complexity and adhesive type.
Usually about an hour or two, depending on model and glue used.
What warranty coverage applies after replacement?
Warranty terms vary by technician and part supplier. Some repairs come with a limited warranty on the glass and workmanship, which provides coverage if the seal fails or the glass detaches.
Warranties vary; check with the service provider for coverage details.
Watch Video
Key Points
- Identify model-specific glass before starting
- Maintain a dust-free work area and organized parts
- Ensure proper bonding to preserve touchscreen and water resistance
- Test comprehensively after reassembly to confirm success