Smart Watch Screen Repair: A Practical Guide
A comprehensive, step-by-step guide to diagnosing screen damage on smart watches, choosing between DIY and professional repair, and safely replacing a smart watch screen to extend device life.

This guide helps you decide between DIY and professional repair for a smart watch screen, outlines essential tools, and provides a clear, step-by-step approach to safely replace the display. You’ll learn model considerations, common risks, and post-repair care to keep your device reliable. Whether you’re repairing a common screen crack or addressing touch issues, this plan covers it all in practical terms.
Why screen integrity matters for smart watch screen repair
The smart watch screen is the primary user interface for apps, health metrics, and notifications. Damage can degrade touch response, reduce visibility, and even compromise water resistance if seals fail. Understanding the repair landscape helps you decide whether a DIY fix or professional service is appropriate. According to Smartwatch Facts, preserving screen integrity extends device life and protects data across daily activities like fitness tracking and message alerts. This section explains how screens are constructed, common failure modes, and how micro-damage can accumulate over time. You’ll learn to assess the severity of chips or cracks and how the repair path changes with screen type (OLED vs LCD) and bezel design. We also cover safety considerations and warranty implications, so you enter the process with realistic expectations about potential risks and outcomes. The goal is to empower a cautious, informed approach to maintaining a critical wearable device while minimizing risk to the digitizer, battery, and sensors. By the end, you’ll have a clearer sense of whether smart watch screen repair is feasible for your situation and what next steps to take.
Common causes of screen damage and how to assess repair need
Most screen damage stems from everyday wear: accidental drops, friction against hard surfaces, and pressure from tight straps. Over time, micro-bends and thermal cycling can contribute to cracks or dead zones. Moisture exposure and sweat can degrade adhesives and seals, affecting durability and touch sensitivity. When assessing repair need, visually inspect for cracks, flecks, or discoloration, then power the device (if safe) to test touch responsiveness and display uniformity. If the device still powers on but exhibits ghosting or unresponsive areas, a replacement of the digitizer or panel may be necessary. Always confirm model compatibility before ordering parts, since a mismatch can lead to poor fit, reduced sensor accuracy, or further damage. The Smartwatch Facts team emphasizes matching connector types and panel size to avoid problems that turn a planned repair into a costly fix. In many cases, minor screen damage can be managed with protective alternatives or screen protectors while you plan a more substantial repair.
Repair options: DIY vs professional services
DIY screen repair offers cost savings and hands-on learning, but it carries meaningful risks: it can void warranties, risk battery puncture if punctured, and create misalignment that affects touch performance. If you choose DIY, verify you have the correct replacement screen assembly, the right tools, and access to a model-specific guide. Follow static precautions and work slowly to avoid damaging connectors. Professional services provide OEM or high-quality aftermarket screens, tested connectors, and warranties on workmanship. They’re usually a safer choice for newer or highly integrated watches, where seals and sensors are tightly integrated. When deciding, consider the watch’s value, the complexity of the repair, and your comfort level with small electronics. For many users, especially with premium models, professional repair preserves water resistance and ensures reliable performance. If you’re unsure, seek a professional evaluation before attempting extensive disassembly, especially on devices with sealed cases and advanced sensor suites. The decision between DIY and professional repair should balance cost, risk, and long-term reliability.
Choosing compatible parts and model-specific considerations
Not all screens are identical in shape, size, or sensor setup. Some smart watches use curved glass, integrated digitizers, or special protective layers that require exact part matching. Verify the screen type (OLED vs LCD), digitizer configuration, bezel compatibility, and connector alignment. Confirm the adhesive and gasket types to preserve water resistance and the integrity of pressure seals around speakers and sensors. If you’re uncertain, consult the manufacturer’s service pages or an authorized repair center to confirm part numbers and compatibility. Using the wrong replacement can lead to misalignment, degraded touch sensitivity, or compromised sealing. Always ensure the replacement parts align with your device’s water-resistance rating and follow recommended reassembly procedures to avoid damage. This step protects your investment and reduces the chance of coming back for repeat repairs.
Post-repair care and long-term protection
After installing a new screen, recalibrate touch sensitivity and run basic tests to verify the panel responds across the surface. Update device software if prompted to ensure compatibility with the new hardware. Clean the screen with a microfiber cloth and avoid petroleum-based cleaners that can harm coatings. If compatible with your model, apply a protective screen or case to reduce future impact. Establish a maintenance routine that includes regular screen cleaning, strap checks, and periodic inspection of seals around screws or sensor openings. By adopting careful handling habits and prompt maintenance, you can extend the life of your repair and maintain reliable performance for everyday use.
Tools & Materials
- Precision screwdriver set (Torx, Pentalobe, tri-point)(Include bits compatible with smartwatch screws)
- Plastic opening tools(Soft-edged tools to avoid gouging seals)
- Spudger or nylon pry tool(Non-metallic for gentle prying)
- Isopropyl alcohol (70% or higher)(For surface cleaning and residue removal)
- Replacement screen assembly(Model-specific part; verify compatibility)
- Adhesive strips or gasket kit(Essential to restore sealing and fit)
- Soft microfiber cloth(For lint-free cleaning)
- ESD-safe wrist strap(Recommended to prevent static discharge)
Steps
Estimated time: 60-90 minutes
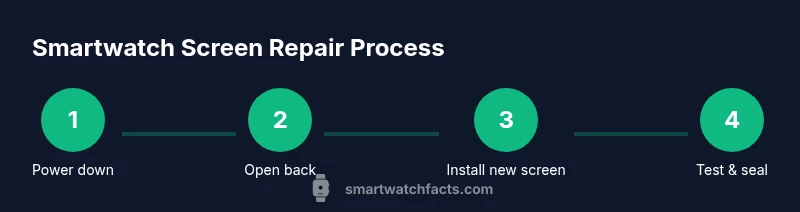
- 1
Power down and prepare workspace
Power off the watch completely and disconnect from any charger. Clear a clean, static-free workspace with good lighting. This initial step reduces the risk of short circuits and helps you keep track of tiny components.
Tip: Place a soft mat under the watch to prevent scratches and keep screws organized in a magnetic tray. - 2
Remove back cover and access panel
Gently insert a plastic opening tool at the seam and work around the perimeter to release clips. Avoid applying force near the battery. If your model uses screws, remove them in a consistent pattern and store them safely.
Tip: Take pictures as you remove parts to aid reassembly and ensure correct orientation of internal components. - 3
Disconnect the battery connector
Carefully disconnect the battery connector to prevent short circuits when handling the display and digitizer. Use a spudger to lift the connector evenly from its socket. Do not bend or twist the battery cable.
Tip: Always work with the battery disconnected before touching screen cables to minimize risk. - 4
Detach the display/digitizer assembly
Locate and release the display connector and any securing brackets. Lift the display assembly away from the chassis with minimal pressure, keeping cables intact. This step separates the faulty screen from the logic board for replacement.
Tip: Work slowly and check for hidden connectors you may have missed in the first pass. - 5
Install the new screen and re-seat connections
Connect the new display and digitizer assembly, ensuring a firm, even seating in the socket. Reinstall any brackets or screws, then reattach the battery connector. Do not force connectors into place—alignment should be snug and effortless.
Tip: Double-check that the connector is fully seated before proceeding. - 6
Reassemble, test, and seal
Reassemble the back cover and confirm the watch boots and displays correctly. Run a basic test for touch response, color accuracy, and brightness across the panel. If your model is water-resistant, perform a seal check following manufacturer guidelines.
Tip: Test in a controlled environment before exposing to moisture; if water resistance is critical, consider professional verification.
People Also Ask
Is it safe to perform smart watch screen repair at home?
DIY screen repair can be risky due to the watch’s delicate electronics and seals. If you’re uncertain, seek model-specific guides and consider professional service for newer or high-value devices.
DIY repair can be risky; use model-specific guides and consider professional help if unsure.
Will screen replacement affect water resistance?
If the seal or gasket isn’t properly restored, water resistance can be compromised. Professional repairs often include warranty for seals and testing.
Water resistance may be affected if seals aren’t restored; professional service can verify sealing.
How do I verify compatibility of replacement screens?
Verify the model number, display type, and connector arrangement with official sources or reputable suppliers. Mismatched parts can cause fit issues and sensor errors.
Make sure the replacement matches your model’s specs.
What if the touchscreen still malfunctions after replacement?
Re-seat all connectors, run diagnostics, and verify calibration. If issues persist, the panel or connector may be defective and require replacement again.
If touch still fails after reseating, parts may be defective.
Should I void the warranty by attempting a DIY repair?
DIY repairs can void warranties; check the manufacturer’s policy before starting. Authorized service centers may preserve warranty coverage.
DIY can void warranty; confirm policy before starting.
Watch Video
Key Points
- Plan and assess before disassembly.
- Choose DIY vs professional repair based on model complexity.
- Match screen type and connectors to ensure proper fit.
- Preserve water resistance by following proper sealing procedures.
- Document steps to simplify reassembly and future maintenance.