How to Replace a Replacement Battery for a Smart Watch
Practical, step-by-step guidance for replacing a replacement battery for smart watch, covering compatibility, tools, safety, testing, and common pitfalls to extend device life.

Learn how to safely replace a replacement battery for a smart watch, including compatibility checks, essential tools, and correct seating. This educational guide covers model-specific cautions, safe disassembly, post-repair testing, and cost expectations. By the end, you’ll be able to complete a battery swap with confidence. Follow this steps-oriented approach for best results.
What is a replacement battery for smart watch?
A replacement battery for smart watch refers to a new power cell designed to fit a specific model's case and connector layout. These batteries are compact lithium-based cells that power all core functionalities, from the display to sensors. The goal of a swap is to restore performance and preserve usability while avoiding damage to fragile components. According to Smartwatch Facts, battery guidance for wearables emphasizes safety, proper fit, and compatibility. Always verify the exact model, chemistry, voltage range, and connector orientation before purchasing. In many watches, the cell is glued or sealed, which makes replacement more complex but feasible with the right tools and careful technique. Checking warranty status first can prevent conflicts if the device is still covered.
Compatibility and model differences
Battery specifications vary widely across models. Even within the same brand, different iterations use distinct sizes, connector types, and adhesive methods. Before buying a replacement, identify your watch model number, production year, and operating system. Compare the voltage, capacity, and connector orientation to the original part. If you’re shopping third-party, look for batteries with proper protection circuitry and clear compatibility notes. The Smartwatch Facts team highlights that compatibility is the single most important factor; mismatched cells can lead to unreliable charging, improper power delivery, or thermal issues.
Safety, warranties, and risk management
Working on a smartwatch battery involves risks such as puncture, short circuits, and heat exposure. Wear gloves and eye protection if a capacitor or connector pops. If your device is under warranty, review terms before proceeding—replacing the battery yourself can void coverage on some models. Use non-static surfaces and keep metal tools away from exposed circuits. Dispose of damaged cells responsibly at an approved e-waste facility. If a swollen or leaking battery is observed, stop immediately and seek professional service.
Preparation and workspace setup
Create a clean, well-lit workspace with good magnification if possible. Have a non-conductive mat, a shallow tray for screws, and a tray or container to keep tiny parts organized. Ensure your watch is powered off and can be safely opened without moisture exposure. Keep a heat source away from sensitive components and avoid using magnetic tools near the device’s internal circuits. Lay out your tools in the order you plan to use them to minimize fumbling during the replacement.
Process overview: what to expect
The replacement process typically involves opening the back cover, disconnecting the old battery, removing the cell, and seating the new one with care. Adhesives may need gentle softening, and certain models require careful alignment of connectors to avoid misfit. After seating the new battery, reconnect all cables, reassemble the housing, and perform a thorough power-on test. If you encounter any abnormal heat, buzzing, or failure to boot, stop and re-check the connections. This overview is designed to help you anticipate steps and avoid shortcuts that could damage the watch.
Tools, materials, and workspace essentials
Preparation is half the battle. A clean, static-free workspace paired with the right tools dramatically lowers the risk of damage. Having a precision screwdriver set, plastic opening tools, a non-conductive mat, and isopropyl alcohol for cleaning contacts will streamline the swap. Keep spare battery spacers and protective tape on hand, along with a soft cloth to wipe connectors. If the battery is glued, a gentle heat source or adhesive remover may be needed, but use with caution to avoid stressing the LCD or seals.
Testing, calibration, and final steps
Once the new battery is seated and all connectors are secure, power on the watch to perform a functional check. Verify screen responsiveness, wireless connectivity, and sensor accuracy. If the device holds a charge and reboots cleanly, reattach any back cover seals and reassemble the case. Leave the watch to cool briefly and monitor for any abnormal behavior over the next few uses. Document the repair and keep track of battery performance for future reference.
Cost expectations and when to seek professional help
Battery replacements can vary in cost by model and part quality. Expect to pay for the battery itself plus a small fee for specialized tools if you don’t own them. If the watch is water resistant, ensure seals are intact after reassembly to maintain protection. If you’re uncomfortable with micro-soldering, adhesive removal, or seal integrity checks, consider professional service to avoid damage or warranty issues.
Tools & Materials
- Replacement battery for your smart watch(Model- and capacity-specific; verify compatibility before purchase)
- Precision screwdriver set(PH000/PH00 or Torx bits as required by model)
- Plastic opening tools (picks/spudger)(Non-metal tools to avoid scratching housing)
- Isopropyl alcohol 70% or higher(For cleaning battery contacts and connectors)
- Tweezers with fine tips(Helpful for handling tiny components)
- Non-conductive mat or tray(Prevents shorts on metal surfaces)
- Adhesive remover or gentle heat source (optional)(Only if the battery is glued; apply cautiously)
Steps
Estimated time: 30-60 minutes
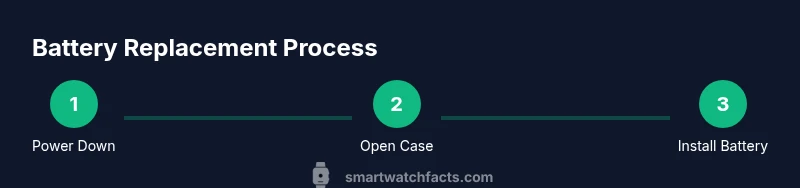
- 1
Power down and prep workspace
Shut off the watch completely and place it on a non-conductive mat. Remove any screen protectors and ensure you have good lighting. Document the current orientation of screws and cables for later reassembly.
Tip: Take a photo of internal connectors before disconnecting anything. - 2
Open back and locate battery
Gently lift the back cover using plastic tools, avoiding pressure on the display. Identify the battery connector and nearby flex cables. If adhesive is present, assess whether heat or solvent is needed to loosen it.
Tip: Work slowly to prevent prying damage to the housing. - 3
Disconnect battery and remove cell
Carefully unplug the battery connector from the daughterboard. Remove the old battery, noting its orientation and any spacers. Keep track of any screws securing the battery or frame.
Tip: Do not pull on the battery itself; disconnect wires from the connector. - 4
Clean cavity and inspect
Wipe the cavity with isopropyl alcohol and inspect for corrosion or debris. If you see residue, remove it gently with a lint-free cloth. Ensure the battery contacts are clean before seating the new cell.
Tip: A clean cavity reduces the risk of poor contact and swelling. - 5
Install new battery and reconnect
Place the new battery in the same orientation as the old one and reconnect the battery cable. Confirm the connector is fully seated and any spacers are in place. Refit any protective tape or shields as originally installed.
Tip: Double-check alignment before reassembly to avoid pinched cables. - 6
Reassemble and test
Carefully reattach the back cover and screws. Power on the watch and verify basic functions: display, touch, Bluetooth, and charging indicator. If the watch shows errors, reopen to check connections.
Tip: Test charging with the charger after door seals are securely closed.
People Also Ask
Is replacing the battery worth it compared with buying a new watch?
If your model is still in good condition and the battery swap reduces overall cost, replacement can be worth it. Consider warranty status, display health, and future software support before deciding.
Replacing the battery can be a smart way to extend life if the watch is otherwise in good shape and the cost is reasonable.
Are all smartwatch batteries the same?
No. Batteries vary by size, chemistry, voltage, and connector type across models. Using an incorrect cell can cause charging issues or damage.
Batteries are model-specific; verify compatibility before purchasing.
What safety steps should I follow?
Power down completely, work on a non-conductive mat, and avoid shortcuts when disconnecting connectors. If you notice swelling or heat, stop and seek professional help.
Protective steps include powering off and keeping the workspace free of moisture and static.
Can I replace a battery under warranty?
Some brands void warranty with self-replacement. Check your warranty terms and consider official service if coverage remains or if you’re unsure.
Warranty terms vary; check policy before attempting a DIY battery swap.
How long does a typical replacement take?
Most swaps take about 30 to 60 minutes for experienced DIYers, depending on model, adhesive, and access to the battery.
Expect about a half hour up to an hour with the right tools.
What if the watch won’t power on after replacement?
Recheck all connections, ensure the battery is seated correctly, and verify that seals haven’t damaged the internal components. If issues persist, consult a professional.
If it won’t power on, recheck connections or seek expert help.
Watch Video
Key Points
- Verify model compatibility before purchasing a replacement.
- Use the correct tools to minimize damage.
- Power down and work on a non-conductive surface.
- Test the watch after reassembly before sealing the case.
- Consider professional help if adhesives or seals are difficult.