How to Make a Smart Watch: DIY Wearable Guide
Learn how to make a smart watch with a practical, step-by-step DIY guide covering hardware, firmware, power management, and safety. Perfect for makers exploring wearable tech and hobbyists seeking hands-on learning.

To learn how to make a smart watch, you’ll assemble a compact sensor board, a low-power microcontroller, and a wearable enclosure. This guide shows a practical DIY approach, focusing on safe power, basic firmware, and testing. You’ll know what to gather, how to wire components, and how to iterate your prototype into a usable wearable.
What you can build and what you can't
If you're wondering how to make a smart watch, this DIY path is best treated as an educational prototype rather than a production-grade device. You can assemble a compact sensor board, a microcontroller, and a lightweight enclosure to explore core concepts like power management, Bluetooth communication, and basic user interface. Expect tradeoffs: battery life will be shorter than commercial models, and waterproofing limited unless you invest in sealing. The goal is to learn, test, and iterate quickly, not to replace a store-bought wearable. By choosing open hardware and firmware, you can swap sensors, adjust the display, and prototype features such as step counting or notifications. Document decisions to track what works and what doesn’t, so future iterations are faster.
Core components and optional hardware options
A successful DIY smartwatch starts with a few core components: a compact sensor board, a low-power microcontroller with Bluetooth Low Energy (BLE), and a small wearable enclosure. Add sensors such as an accelerometer and a heart-rate module if you want health features. Choose a display type (OLED, LCD, or e-ink) and a power source (rechargeable battery). Optional modules—GPS, ambient light sensor, or NFC—expand capability but add complexity. Plan for a tiny battery connector, flexible PCB or breadboard, and secure housing. Emphasize open-source firmware and clearly documented interfaces so you can swap parts without redesigning the whole device.
Designing for power and onboard sensors
Power is the single biggest constraint in wearables. Start with a low-power microcontroller and design a wake-sleep cycle so the device only brightens the display when needed. Select sensors with low quiescent current and implement efficient data sampling rates. Consider how often you’ll update the display, transmit data over BLE, and log information locally. A simple power budget can help you decide how long a prototype will run between charges and what duty cycles are reasonable for features like heart-rate monitoring or step counting.
Tools, materials, and safety considerations
Before you begin, assemble a basic toolkit and the essential materials. A soldering iron, wire cutters, a USB programmer, and a multimeter are helpful. You’ll also need a compatible battery, protective casing, and connectors. Safety comes first: work in a ventilated area, use proper Li-Po handling practices, and never leave charging batteries unattended. Use a protective enclosure to prevent shorts, and label wiring to avoid mix-ups during assembly. Testing should be done with a restricted power supply and appropriate fusing to prevent damage.
Enclosure design and display choices
Your enclosure shape and display choice define usability. 3D-printed shells or laser-cut cases give quick results, while injection-molded enclosures are more durable. For displays, OLED screens offer color and clarity, while e-ink is power-efficient for static information. If you want touch input, consider a small capacitive panel or physical buttons. Remember to provide access to charging ports and to protect the display with tempered glass or a protective film. A modular design helps you swap parts as you learn.
Firmware and software basics for DIY wearables
Firmware is the brain of your smartwatch. Start with a simple firmware stack: sensor drivers, data processing, BLE communication, and a tiny user interface. Use open-source cores to learn structure and debugging practices. C or C++ is common, with MicroPython or JavaScript-based runtimes for experimentation. Keep firmware modular and document APIs so you can upgrade features without rewriting everything. Security matters: implement basic authentication for BLE and avoid hard-coded credentials.
Testing, debugging, and iteration plan
Testing should cover hardware connections, battery life, sensor calibration, and BLE pairing. Build a test harness that can simulate user actions and log results. Calibrate the accelerometer and heart-rate sensor against known references, and verify that notifications arrive reliably. Record data over multiple charge cycles to assess stability. Iterate by swapping sensors, adjusting sampling rates, and refining the UI. Small improvements accumulate into a usable prototype.
Real-world use cases and customization ideas
A DIY smartwatch can support fitness tracking, basic notifications, and quick interactions. Start with step counting, activity detection, and a simple timer. Add notifications for calls or messages, weather, and calendar reminders. Customize the watch face for readability in sunlight, and experiment with offline data logging to reduce BLE usage. As you gain confidence, you can prototype more advanced features like GPS tracking or health alerts.
Next steps, learning resources, and safety reminders
If you’re committed to learning, join a maker community or follow open-source wearables projects to learn best practices. Document every build, including schematics, firmware versions, and test results. For deeper knowledge, consult reputable sources on embedded systems, BLE protocols, and Li-Po safety. Remember: safety and responsible prototyping are as important as creativity when you learn how to make a smart watch.
Tools & Materials
- Microcontroller with BLE(Low-power, compact footprint suitable for wearables)
- Sensor module (accelerometer/gyroscope)(Prefer modules with integrated calibration)
- Heart-rate sensor module(Optional for health features)
- Display panel (OLED/LCD/e-ink)(Choose size ≤ 1.5 inches)
- Battery cell (Li-Po) with protection circuit(Safety-rated, appropriate capacity)
- Protective enclosure(3D-printed or machined)
- Charging port and connectors(USB-C or micro-USB depending on design)
- Soldering tools, wires, and basic tools(ESD-safe, include flux, tweezers)
- Prototyping board/PCB(For initial wiring; upgrade to compact PCB)
- Testing equipment (multimeter, basic oscilloscope)(Use for debugging signals)
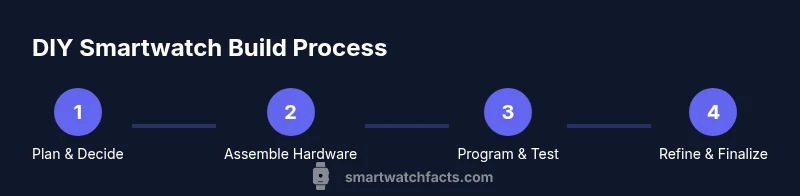
Steps
Estimated time: 6-12 hours
- 1
Gather components and plan layout
Collect all core components and sketch a compact layout that minimizes wire length and keeps battery access clear. Confirm BLE range expectations and sensor placement for accurate readings. This planning saves time during assembly.
Tip: Create a simple diagram showing where each part sits to reduce rework. - 2
Design enclosure and display layout
Choose an enclosure style and determine display position, button placement, and charging access. Ensure there’s room for a vented power switch and for cable routing without pinching wires.
Tip: Mock up the enclosure in a 3D model before printing. - 3
Assemble electronics on board
Mount the microcontroller, sensors, and display on a prototyping board or PCB. Double-check polarity and connector orientation before powering the circuit for the first test.
Tip: Power the board with a bench supply at a safe current limit while testing. - 4
Program firmware and pair BLE
Load a basic firmware skeleton that reads sensor data, processes it, and transmits via BLE. Implement a simple UI and basic pairing with a test device or smartphone.
Tip: Use serial prints during development to verify sequence and timing. - 5
Test core functions and safety checks
Verify sensor readings, BLE connectivity, and basic power behavior. Check current draw in sleep mode and ensure the battery temperature stays within safe ranges.
Tip: Run bench tests to confirm you won’t exceed safe charging currents. - 6
Iterate design and finalize enclosure
Refine hardware placement, adjust the enclosure for comfort, and update the BOM. Re-test after each change to validate improvements.
Tip: Document every change with screenshots and notes for future rebuilds.
People Also Ask
Is it feasible for beginners to build a smartwatch at home?
Yes, with a modular approach and focus on fundamentals. Start with a simple feature set and expand as you gain confidence.
Yes, beginners can start small and learn as they build.
What skills do I need?
Basic electronics, soldering, firmware debugging, and safety awareness. You can pick up these skills gradually through hands-on practice.
You’ll need electronics, soldering, and firmware debugging basics.
How long will it take to complete?
Expect several sessions; duration varies with complexity and prior experience.
A few days to a few weeks, depending on scope and learning pace.
Can I waterproof a DIY smartwatch?
Waterproofing a DIY device is challenging. Aim for splash resistance and avoid submersion where possible.
Waterproofing a DIY watch is hard; keep it splash-safe.
What safety steps are essential with batteries?
Use a protective enclosure, avoid puncturing Li-Po cells, monitor charging, and work on non-flammable surfaces.
Handle lithium batteries carefully and never charge unattended.
Where can I find beginner-friendly firmware?
Explore open-source wearable projects and microcontroller communities for starter firmware and examples.
Check open-source wearables projects for starter firmware.
Watch Video
Key Points
- Define your goal before selecting hardware.
- Prioritize power-efficient components to extend life.
- Prototype early and test often.
- Document decisions and test results for reproducibility.
- Handle batteries safely and follow safety guidelines.